How to Incorporate LED Light Therapy in Your Daily Skincare Routine
In our busy lives, we often forget to give ourselves the care we need and deserve. Amidst all the hustle and bustle, it's essential to take some time out for ourselves. Our skincare routine is one such personal time that we should treasure and make the most out of. Incorporating LED light therapy in your daily skincare routine can be a game-changer, and here’s how you can do it.
Understanding LED Light Therapy
Before incorporating LED light therapy into your routine, it's crucial to understand what it is. LED (Light Emitting Diode) therapy uses varying wavelengths of light, including red and blue. Originally used by NASA, this technique has been clinically proven to provide numerous therapeutic benefits to the skin.
Importance of LED Light Therapy
LED light therapy is a non-invasive skincare treatment that targets a variety of skin issues like acne, inflammation, and signs of aging. It boosts collagen production, promoting more youthful-looking skin, and kills acne-causing bacteria, reducing breakouts. It also helps in reducing inflammation and improving the skin's overall texture.
How to Incorporate LED Light Therapy in Your Routine
Start with Clean Skin and Apply Corrective CC Serum
For LED light therapy to work most effectively, you need to start with clean, fresh skin. Make sure to cleanse your face thoroughly with a suitable face wash or cleanser. It's also recommended to exfoliate 1-2 times a week to remove dead skin cells and allow better light penetration. Before you start the LED therapy, apply a layer of corrective CC serum. The serum will help to further enhance the effects of the light therapy.
Use an LED Light Therapy Device
The market is flooded with at-home LED light therapy devices like the Mask & Glo Pro. These devices are easy to use and can be incorporated into your routine without hassle. Simply put on the device like a mask, select your desired light setting, and leave it on for the recommended time.
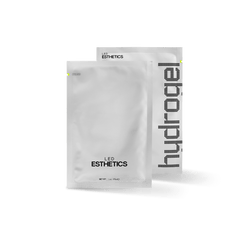
Post-Therapy Skincare: Hydrogel Application
After the LED therapy session, it's time to lock in the benefits with a Hydrogel. These gel-based skincare products are excellent for providing deep hydration and soothing the skin after light therapy. Just apply a hydrogel all over your face and let it absorb.
Finish with a Moisturizer
Following the hydrogel, you can finish your routine with your favorite moisturizer to further lock in moisture and the benefits of the LED light therapy.
Consistency is Key
Like any skincare treatment, consistency is key with LED light therapy. Incorporating it into your daily routine will yield the best results. Remember, patience is vital, as noticeable results usually take a few weeks to appear.
By understanding the benefits of LED light therapy and how to use it, you can easily incorporate this advanced skincare treatment into your routine. So, say hello to glowing, healthier skin every day.
How to Build a Complete Anti-Aging Skincare Routine in 2026
LED-SCIENCE [07-09-2026]
BY MADISON CARTER
How to Build a Complete Anti-Aging Skincare Routine in 2026
Most anti-aging routines fail for the same reason, they are a pile of products rather than a plan. Somewhere along the way the bathroom shelf fills up with serums, acids, and creams bought on a whim, half of them working against each other, and the skin ends up irritated rather than improved. More steps start to feel like more progress, when usually they are the problem.
A complete anti-aging skincare routine is not about owning the most products. It is about using the right ingredients, in the right order, consistently enough for them to work. Get that foundation right and a handful of proven steps will outperform a ten-step shelf every time. This guide breaks down exactly what causes skin to age, the ingredients that actually move the needle, and how to structure a morning and evening routine that holds up over the long term.
What Causes Your Skin to Age the Most?
Skin ages through two separate processes happening at once.
Intrinsic aging is the natural, genetically programmed decline that happens to everyone. Collagen production drops by roughly 1% per year from the mid-twenties onwards, elastin breaks down, cell turnover slows, and the skin gradually loses the firmness and bounce it had. You cannot stop this entirely, but you can slow it down.
Extrinsic aging is the accelerated damage caused by external factors, and this is where most visible aging actually comes from. The main drivers are:
UV exposure – Responsible for up to 90% of visible skin aging, breaking down collagen and triggering pigmentation faster than any other single factor.
Oxidative stress – Free radicals from pollution, UV, and lifestyle factors damage skin cells and degrade collagen and elastin.
Inflammation – Chronic low-grade inflammation accelerates the breakdown of structural proteins and keeps the skin in a reactive state.
Lifestyle factors – Poor sleep, high-sugar diets, smoking, and dehydration all show up in the skin over time.
The good news is that extrinsic aging is largely within your control. A well-built anti-aging routine works by protecting against these drivers while actively supporting the collagen and cell renewal that naturally decline with age.
When Should You Start an Anti-Aging Routine?
The most common question, and the honest answer is earlier than most people think. The best time to start an anti-aging skincare routine is your mid-to-late 20s, right as collagen production starts to gradually decline. Prevention is far more effective than correction, because protecting existing collagen is always easier than trying to rebuild what has been lost.
That said, starting later still produces real results. The skin responds to the right inputs at any age, and a consistent routine begun in your forties or fifties will still improve firmness, texture, and tone. The principle is simple, the best time to start was a decade ago, and the second-best time is now. What matters more than your starting age is consistency from the point you begin.
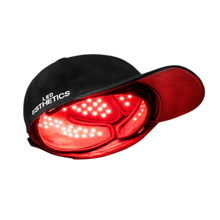
A red light therapy mask that works on the collagen behind fine lines, not just the surface. The kind of step worth building an anti-aging routine around.
The Key Anti-Aging Ingredients
The skincare market is built on overwhelming you with options, but the list of ingredients with genuine clinical backing for anti-aging is short. Master these and you have covered everything that matters.
Retinoids
Retinoids are the most proven anti-aging ingredient available. Derived from vitamin A, they accelerate cell turnover and directly stimulate collagen production, which visibly softens fine lines, refines texture, and improves firmness over time. Prescription tretinoin is the strongest option, while over-the-counter retinol delivers similar benefits more gradually.
Vitamin C
Vitamin C is the anti-aging hero of the morning routine. As a potent antioxidant, it neutralises the free radicals generated by UV and pollution before they can damage collagen, while also brightening uneven tone and supporting collagen synthesis. Used under SPF, it forms a powerful layer of daytime protection. Look for a stable formulation at a concentration your skin tolerates without stinging.
Peptides
Peptides are signal proteins that instruct the skin to produce more collagen. Applied topically in a serum or moisturiser, they support the skin's structural repair processes and pair well with both retinoids and LED light therapy. They are gentle, well tolerated, and a smart addition for anyone whose skin cannot handle aggressive actives every day.
Hyaluronic Acid
Hyaluronic acid does not build collagen, but it keeps the skin plump, hydrated, and smooth, which makes fine lines visibly less pronounced. It draws moisture into the skin and supports the barrier, and because it is so gentle it works at any age and alongside every other ingredient on this list. Apply it to slightly damp skin and seal it in with a moisturiser.
Niacinamide
Niacinamide is the all-rounder. It strengthens the skin barrier, regulates oil, calms redness, supports the production of collagen, and improves overall tone, all without causing sensitivity. It plays well with everything, making it one of the easiest and most reliable additions to an anti-aging routine.
Broad-Spectrum SPF
SPF is not optional, it is the single most important anti-aging product you own. UV exposure is the biggest driver of visible aging, and daily broad-spectrum SPF 30 or higher protects every gain the rest of your routine is working to make. Without it, retinoids and vitamin C are building collagen that UV is actively tearing back down.
Your Morning Anti-Aging Routine
The morning routine is about protection. The goal is to defend the skin against the UV, pollution, and oxidative stress it will face throughout the day. Keep it streamlined:
A gentle cleanser to start with a clean base without stripping the skin
Apply a vitamin C serum to clean skin for antioxidant protection and glow
Layer hyaluronic acid for hydration and plumpness, ideally on damp skin
Apply a lightweight moisturiser to lock in hydration and support the barrier
Finish with broad-spectrum SPF, applied everyday regardless of weather
The order matters here. Thinner, water-based products like serums go on first so they can penetrate, with heavier creams and SPF sealing everything in on top.
Your Evening Anti-Aging Routine
The morning is about protection, the evening is about repair. This is when the skin does most of its regenerative work, which makes it the right time for your most active ingredients and treatments:
Start with a thorough cleanse to remove makeup, SPF, and the day's buildup
Apply a retinoid to clean, dry skin a few nights a week (gradually increase)
Follow with a 10-minute LED light therapy session to stimulate collagen
Seal everything in with a nourishing moisturiser to support skin repair
A device like the Glotech Pro LED face mask delivers clinically tested wavelengths across the full face hands-free, and slots neatly into any evening skincare routine.
A practical note on timing: LED light therapy works best on freshly cleansed skin, because any product or residue on the surface reflects light away and reduces how much actually reaches the deeper layers where collagen is built. The only thing worth applying beforehand is a light-activated serum, which is formulated to enhance absorption rather than block it.
Why LED Light Therapy Works for Anti-Aging
Topical ingredients can only do so much from the surface. LED light therapy has become a core part of modern anti-aging because it works from a different angle entirely, stimulating the skin at a cellular level in a way creams and serums cannot replicate.
For the face, an LED face mask can cover the full area in a single hands-free session. For the neck and chest, which age faster than the face and are almost always neglected, an LED neck mask extends the same collagen support to the area that frames the jawline.
What makes it such a natural fit for an anti-aging routine is how well it complements everything else:
It amplifies your topicals
Red light stimulates collagen from within while retinoids and peptides support it from the surface, a combination stronger than either alone.
It is gentle and consistent
With no downtime and no irritation, it can be used several times a week without overloading the skin.
It addresses what creams cannot
Topicals work on the surface, while LED reaches the deeper dermal layers where collagen and elastin are produced.
Common Anti-Aging Skincare Mistakes to Avoid
A good routine is undone just as easily by the wrong habits as it is built by the right ones. These are the mistakes that quietly hold most people back:
Skipping SPF – The single most damaging omission. Every other anti-aging step is wasted if UV is left to break down collagen unchecked.
Over-exfoliating – Stripping the skin with daily acids or scrubs compromises the barrier and creates inflammation, which accelerates aging rather than slowing it.
Using too many actives at once – Layering retinoids, acids, and high-strength vitamin C together tends to irritate the skin rather than improve it.
Product-hopping – Switching products every few weeks never gives anything time to work. Anti-aging results are built over months of consistency, not days.
Starting actives too aggressively – Introducing a strong retinoid every night from day one is the fastest route to irritation. Build up slowly.
Final Thoughts
A complete anti-aging skincare routine is not about chasing every new product or building the longest possible regimen. It is about protecting the skin from what ages it, supporting the collagen and renewal that naturally decline, and staying consistent long enough for the results to compound.
Get the foundations right. Daily SPF, a vitamin C morning, a retinoid evening, LED light therapy to stimulate collagen, and the hydration and barrier support that hold it all together. Start where you are, keep it consistent, and let the results build.
If you are ready to add the collagen-stimulating power of LED light therapy to your anti-aging routine, explore Glotech LED devices to find the right device for your skin.
Frequently Asked Questions
What is the correct order for an anti-aging skincare routine?
Apply products from thinnest to thickest. In the morning: cleanse, vitamin C serum, hyaluronic acid, moisturiser, then SPF. In the evening: cleanse, retinoid, LED light therapy, peptide or hydrating serum, then moisturiser. Serums penetrate first, with heavier creams and SPF sealing everything in.
At what age should I start an anti-aging routine?
The mid-to-late 20s is ideal, as collagen production begins declining around then and prevention is more effective than correction. That said, starting at any age still delivers real improvements in firmness, texture, and tone, so the best time to begin is whenever you start.
Can I use retinol and LED light therapy together?
Yes, but most people alternate them rather than using both on the same night, to avoid overloading the skin. Both work best on clean skin, and skincare should be applied after an LED session rather than before, since retinol reduces how much light penetrates.
What is the most important anti-aging product that you often forget?
Broad-spectrum SPF. UV exposure causes up to 90% of visible skin aging, so daily sun protection preserves every gain the rest of your routine makes. Without it, active ingredients like retinoids and vitamin C are building collagen that UV continues to break down.
How long does an anti-aging routine take to show results?
Early improvements in brightness and texture often appear within 1–4 weeks. Collagen-related changes like firmer skin and softer fine lines typically develop over 4–12 weeks, with the most significant structural results building beyond the 3-month mark.
What Skincare Should You Avoid After LED Light Therapy?
LED-SCIENCE [04-27-2026]
BY MADISON CARTER
What Skincare Should You Avoid After LED Light Therapy?
Putting the wrong skincare on after LED light therapy is one of the most common ways people quietly sabotage their own results. The session works, the skin responds, and then an ill-timed retinoid or exfoliating acid undoes a good chunk of the progress. Knowing what to avoid and what to reach for in that post-session window is what keeps results building in the right direction.
Skincare Ingredients to Avoid After LED Light Therapy
The skin's heightened state after treatment means ingredients that are ordinarily well tolerated can cause irritation or sensitivity when applied too soon. The ones to hold off on immediately after a session:
Retinoids and retinol
Retinol increases skin sensitivity and applying it directly after LED therapy can cause irritation even in those who normally tolerate it well. Use it on alternate days or later in the evening once the skin has fully settled.
Exfoliating acids
AHAs such as glycolic and lactic acid, and BHAs such as salicylic acid, should be avoided directly after treatment. These can irritate the skin and potentially negate the benefits of the treatment for at least 24 to 48 hours post-session.
Vitamin C in high concentrations
A stabilised vitamin C serum at a moderate concentration works well post-session. High strength formulations, particularly those with a low pH, can cause stinging and redness on freshly treated skin.
Mineral sunscreens applied immediately after
While SPF is essential after a daytime session, mineral formulas containing titanium oxide can reflect and scatter light away from the skin and reduce treatment effectiveness if applied too close to the session.
Heavy occlusive creams
Thick, heavy formulas applied immediately after treatment can trap heat in the skin and cause congestion. Allow the skin to breathe briefly before sealing anything in.
Fragrance and alcohol-based products
Both are common irritants at any time, but particularly on skin that has just been treated. Anything with synthetic fragrance or high alcohol content should be avoided in the post-session window entirely.
How Long to Wait Before Applying Skincare
The good news is the wait is not long. For most people and most products, applying skincare immediately after an LED session is completely fine as long as the right products are chosen. The skin does not need extended recovery time the way it does after more aggressive treatments like chemical peels or lasers.
The general guidance:
Immediately after – Hydrating serums, gentle moisturisers, and peptide-based products can be applied straight away
Wait 20 to 30 minutes – Before applying anything with active ingredients including retinoids, high strength vitamin C, or exfoliating acids
Wait 24 to 48 hours – Before reintroducing strong exfoliants or prescription-strength actives to the routine
Daytime sessions – Apply a broad spectrum SPF after your session before any sun exposure, even brief
The post-session window is actually one of the best times to apply Supportive Skincare. The skin absorbs ingredients more effectively in this state, which is why choosing the right products to apply after matters just as much as knowing what to avoid.
What You Should Use After LED Light Therapy
The ingredients that work best during the post-session window are those that hydrate, support the skin barrier, and complement what the LED session has already started.
Hyaluronic acid serum – Draws moisture into the skin and keeps it plump and hydrated. One of the most compatible post-session ingredients available
Peptide moisturiser – Supports collagen production and barrier repair, working directly alongside what red light therapy is stimulating internally
Hydrogel mask – An excellent option for an extra boost of post-session hydration and calming, particularly after more frequent use
Niacinamide – Soothes redness, supports barrier repair, and improves skin tone without causing sensitivity post-treatment
Gentle, fragrance-free moisturiser – Locks in hydration and supports the skin barrier without introducing unnecessary irritants
Avoid layering too many products at once. Two to three well-chosen products applied in the right order will always outperform a complicated ten-step routine applied to freshly treated skin.
Safety Considerations
Not everyone sees results at the same pace. These are the variables that matter most:
Consult a doctor before use during pregnancy, as most LED devices have not been clinically tested on pregnant women.
Anyone with a photosensitive condition such as lupus or epilepsy should seek medical advice before starting treatment.
Check all medications and skincare labels for photosensitivity warnings, including certain antibiotics and acne medications.
Do not use LED therapy alongside prescribed skincare without consent from your practitioner.
Approach treatment with caution during an active flare of eczema, psoriasis, or rosacea and consult a dermatologist if unsure.
LED light therapy is safe for the vast majority of people, but there are circumstances where extra caution or medical advice is warranted before starting treatment.
Choosing an FDA-cleared device adds an important layer of confidence, ensuring the technology meets tested safety and efficacy standards before it reaches your skin.
Final Thoughts
LED light therapy is one of the more forgiving treatments available, but what happens after the session matters more than most people realise. The skin is primed and receptive, and the products you reach for in that moment either compound your results or quietly work against them.
Avoiding the wrong ingredients is just as important as choosing the right ones. Retinoids, strong exfoliants, and heavy occlusives applied too soon can irritate freshly treated skin and slow the very results you are working toward.
If you are ready to build a routine that works with your LED sessions rather than against them, explore the Glotech LED Skincare Devices, formulated to complement every stage of your light therapy routine.
Frequently Asked Questions
Should I prep my face before LED light therapy?
Yes, and it comes down to two steps. Cleanse thoroughly first to remove any makeup, SPF, or product residue that would block light from penetrating the skin. Then apply a Light-Activated Serum, which is formulated to enhance light absorption rather than create a barrier, so the wavelengths reach deeper where they are most effective.
Is it safe to use retinol with LED light therapy?
Yes, retinol and LED light therapy can be used together, but timing matters. Wait at least 24 hours after a session before applying retinol, as it increases skin sensitivity and applying it too soon can cause irritation even in those who normally tolerate it well. Using it on alternate days to your LED sessions is the most reliable approach.
Can I wear makeup after using an LED face mask?
Yes, makeup can be applied after an LED Face Mask session. For best results:
Give your skin a few minutes to absorb any post-session skincare first
Avoid heavy or occlusive foundations directly after treatment
Choose fragrance-free formulas where possible to minimise the risk of irritation
Can you exfoliate after LED light therapy?
Not immediately. After a session the skin is in a heightened state of repair and more sensitive than usual. Applying exfoliants too soon can cause irritation, redness, and disrupt the cellular renewal process the treatment just triggered. Here is when it is safe:
Wait at least 24 hours before using a mild chemical exfoliant like a low strength AHA
Wait 48 hours before reintroducing stronger acids or physical scrubs
Avoid exfoliating entirely on the same day as your session
When you do exfoliate, keep it gentle and follow immediately with a hydrating serum or moisturiser to support the skin barrier.
How often should I use my light therapy device?
Most people start at 3–5 sessions per week and build toward daily use as the skin adjusts. Daily use is safe when following your device's manufacturer guidelines and using the right post-session skincare. Consistency is what drives results, and pairing sessions with the correct products is what maximises them.
You have heard about the glowing skin, the reduced fine lines, the cleared acne from red light therapy. It delivers on all of it and more, with benefits that build the longer you stay consistent. Your skin starts responding immediately, but what does the timeline look like? Here is how long it takes to see results and what to expect at every stage.
How Does Red Light Therapy Work?
Red light therapy works on a cellular level through a process called photobiomodulation.
When red and near-infrared light penetrate the skin, they are absorbed by the mitochondria, the powerhouses inside your cells, which then produce more primary energy for your body (also known as ATP).
With that extra energy, your cells can:
Repair and regenerate faster
Produce more collagen and elastin
Regulates sebum production
Calm inflammation at the source
Increase blood circulation to treated areas
Think of it as a power-up for your skin's natural renewal process. No UV exposure, no downtime, no recovery. Just your skin functioning better than it was before.
Benefits of Red Light Therapy
The clinical evidence behind red light therapy for skin covers a broad range of benefits:
Results vary from person to person, but the journey to healthier, more radiant skin generally follows a predictable path. Here is what most users experience with three to five sessions per week:
Short-Term Results: Weeks 1 to 4
During the first month, the changes are often more felt than seen. Many people report that their skin feels smoother, more hydrated, and looks noticeably brighter as light therapy works to boost circulation and reduce underlying inflammation. While a dramatic transformation is not expected yet, these early signs are proof that your skin is already responding:
Reduced puffiness and calmer redness
More even skin tone and visibly reduced inflammation
Early softening of fine lines around the eyes and forehead
Mid-Term Results: Weeks 4 to 12
After a month or two of sticking to a routine, the results start becoming visible to others, not just you. Increased collagen production begins to pay off and the cumulative effects of your sessions build on each other. This is the phase most people wish they had started sooner:
Fine lines and crow's feet noticeably softer
Clearer skin with less breakouts
More even tone and reduced hyperpigmentation
Visibly brighter, firmer, smoother skin
Long-Term Results: 3 Months +
Beyond the three month mark, you are looking at genuine, lasting transformation. The structural improvements in your skin become much more significant, and results feel sustained rather than temporary. Here is what that looks like:
Deeper wrinkles visibly diminished
Sustained firmness and plumpness
Hyperpigmentation and sun damage fade
Fewer breakouts, less inflammation, and skin that recovers faster
Skin that looks and feels genuinely more resilient
Factors That Impact Your Results
Not everyone sees results at the same pace. These are the variables that matter most:
Consistency – Sporadic sessions do not allow the cellular changes to compound. Three to five sessions per week is the minimum for meaningful progress.
Device quality – Clinical-grade LED power at the correct wavelength determines how much light actually reaches the target tissue. Device output matters as much as frequency.
Skin condition and age – Mature skin or more advanced concerns take longer to respond but often show more significant improvements over time.
Treatment area – Facial skin typically responds faster than deeper tissue concerns like joints or hair follicles.
Lifestyle – Hydration, sleep quality, and sun protection all influence how efficiently the skin repairs and regenerates between sessions.
Maximising Your Red Light Therapy Benefits
Choosing the right device for your concern is the starting point. From there, how you use it and what you pair with it determines everything.
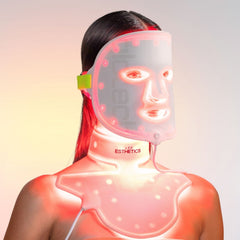
This Clinical-grade LED Mask delivers red, blue, and near-infrared wavelengths across the full face in a single ten minute hands-free session. Its dual therapy modes and 198 FDA-cleared LEDs emit up to 44mw/cm2 of irradiance, making it effective for anti-aging and anti-acne.
Use 5–7 times per week on clean skin, paired with a Light-activated Serum before each session to maximise light absorption. Follow immediately after with a Hyaluronic Acid Serum or Peptide Moisturiser to lock in hydration and support skin recovery.
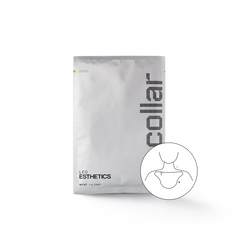
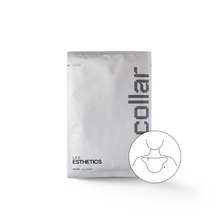
Glotech Collar: Red Light Neck and Chest Mask
If you are concerned about signs of aging on the neck and chest, the Glotech Collar offers a targeted solution for one of the most neglected areas in most skincare routines.
Its curved medical-grade silicone format conforms to the neck and décolleté, with 98 FDA-cleared LEDs delivering 630nm and 830nm wavelengths at an irradiance of 30mw/cm2. It targets horizontal neck lines, crepey texture, and sun damage across the décolleté.
Use 3–5 times per week on clean skin and extend your full skincare routine to the neck and chest alongside each session.
Glotech Minis: LED Spot Treatment
For the delicate or hard to reach areas a full mask cannot target, the Glotech Minis deliver precise LED Spot Treatment exactly where it is needed. Powered by red, yellow, and near-infrared light across two targeted modes, its MemoryContour design hugs every curve for maximum contact and results.
Use 9 minutes per area, 5 times per week on clean dry skin. Pair with a targeted serum like Vitamin C Ageless Complex, applied immediately after each session for enhanced results.
Final Thoughts
Red light therapy rewards patience and consistency above everything else. The cellular processes behind visible results are not instantaneous, but they are clear, and compound as you maintain your LED sessions.
That said, the timeline is not the only part of the equation. Make sure to start with the right device for your concern, use it correctly and pair it with the right products to get the most out of every session.
If you are ready to get started, explore Glotech Light Therapy Devices with clinical-grade LED power built for real results. Find the right fit for your skin goals.
Frequently Asked Questions
Does red light therapy work after just one session?
Red light therapy begins working at a cellular level from the first session. Most people notice a post-session glow and calmer skin immediately, but lasting structural changes require consistent use over several weeks.
How long should each red light therapy session last?
Most at-home LED masks are designed for 10 minute sessions. Spot treatment devices typically run for around 9 minutes per area. Full body panels usually require 15–20 minutes depending on device strength. Always follow your device's manufacturer guidelines.
How do I know if red light therapy is working?
In the first four weeks, you can typically expect to see:
Calmer redness and reduced puffiness
Smoother, more hydrated skin
A subtle healthy glow
From week four onwards:
Firmer, brighter skin
Softer fine lines and wrinkles
Clearer, more even skin tone
How should I track my progress?
Take a before photo in natural light before your first session
Photograph the same area every two to four weeks (under the same lighting)
Note how your skin feels after each session, not just how it looks
Focus on your specific concern
Is red light therapy safe for all skin types?
Yes, red light therapy is safe for all skin types and tones. It is non-invasive, generates no UV exposure, and does not cause thermal damage, making it suitable even for sensitive or reactive skin.
If you are pregnant, on photosensitive medication, or have a condition like lupus or epilepsy, consult your doctor before starting treatment.
Most people spend a lot of time researching the right device but give far less thought to how often they should actually use it. Getting the optimal frequency for red light therapy treatments right is a difference maker, determining whether you see real results or plateau before they ever really begin.
Keep reading to find out what dermatologists recommend, how frequency changes depending on your goals, and how to build a routine that consistently delivers.
What Is Red Light Therapy?
Red light therapy, clinically known as photobiomodulation, uses specific wavelengths of light, typically 630 to 660nm red and 830 to 850nm near-infrared, to penetrate the skin and stimulate cellular activity. It is non-invasive and requires no downtime, making it one of the more practical at-home skin treatment options available.
Premium devices like the Glotech Pro LED Face Mask deliver these clinically tested wavelengths directly to the skin, working to:
Reduce fine lines and wrinkles
Stimulate collagen and elastin production
Soothe redness and inflammation
Improve overall skin tone and texture
Support faster healing after breakouts or procedures
All of this happens without UV exposure, heat damage, or side effects, making it a credible alternative to more invasive treatments.
Daily Use: What Dermatologists Recommend
Daily use is safe for most people when following your device's manufacturer guidelines, but most dermatologists recommend starting at three to five sessions per week and building from there as the skin adjusts.
LED therapy is dose-dependent, and consistent sessions over time drive results far more than occasional long treatments.
As Dr. Lisa Espinoza, a board-certified dermatologist, puts it: "Red light therapy is dose-dependent. Consistent sessions drive results far more than occasional long treatments."
Harvard dermatologist Dr. Rachel Reynolds echoes this, noting that devices need to be used multiple times a week for four to six months to be effective. It is slow and steady, not a quick fix.
Once your skin has adjusted and tolerates treatment well, daily use is appropriate for most people. Recommended session frequency by treatment area:
Face (anti-aging, skin health): 5 to 7 times per week
Neck and chest (texture, redness): 3 to 5 times per week
Spot treatments (breakouts, dark spots): 5 times per week
Active acne: Daily on clean, dry skin
Think of the first three to five weeks as your results phase. After that, maintenance keeps the skin in a healthier, more stable state.
Can You Overdo Red Light Therapy?
Yes, you can overdo red light therapy, though the effects are rarely serious. Overuse is more likely to stall your progress than cause any real harm, with temporary dryness or mild irritation being the most common signs that you are pushing beyond the optimal therapeutic window.
Signs you may be overdoing it:
Temporary redness or warmth after sessions that did not occur before
Skin feeling dry or tight more than usual
Results plateauing or declining despite consistent use
Mild fatigue after longer sessions
To avoid overuse:
Follow your device's recommended session length and distance guidelines
Limit sessions to 10 minutes per area
Take a rest day if you notice sensitivity or irritation
None of these signs are serious, and they resolve quickly. Simply pulling back on frequency or shortening sessions by a few minutes is enough to get the skin settled and for results to pick back up.
How Long Should Each Red Light Therapy Session Last?
Session length depends on the area being treated and the power output of your device. General guidance:
Face: 10 minutes per session for most at-home LED masks
Neck and chest: 10 minutes
Spot treatment areas: Around 9 minutes per area
Active acne: 3 minutes on clean, dry skin
Full body panels: 15 to 20 minutes depending on device strength
The device's output level determines the dose delivered, not time alone. A well-calibrated device at the correct wavelength delivers the therapeutic dose within the recommended window, which is why following manufacturer guidelines matters more than adding extra minutes.
The Glotech Mask Pro is built with clinical-grade LED power that makes the standard ten minute session genuinely effective, so there is no need to second guess the timing.
How to Get the Best Results
To maximize the benefits of LED light therapy:
Cleanse skin thoroughly before every session
Apply a Light-Activated Serum before treatment to enhance absorption
Apply a Hyaluronic Acid Serum or Peptide Moisturiser immediately after
Use consistently according to your manufacturers recommended frequency
Combine with your existing skincare routine for enhanced results
Common Mistakes to Avoid
Starting at daily use before the skin has had time to adjust
Expecting visible change in days rather than weeks
Ignoring your device's guidelines for treatment frequency and duration
Final Thoughts
Start slow, build gradually, and adjust as your skin responds. The right frequency is the one that fits your lifestyle and that you can maintain long term, with 3–5 sessions per week being the recommended sweet spot.
The truth is, frequency only gets you so far without the right device behind it. If you are ready to get started, explore Glotech Light Therapy Devices with clinical-grade LED power for best results. Find the right fit for your skin goals.
Frequently Asked Questions
Can I use red light therapy with my skincare on?
No, skincare products should not be applied before your session. Makeup, SPF, and product residue create a barrier that reduces how much light penetrates the skin, leading to slower and less effective results. Always treat clean skin and apply your skincare routine after.
Is red light therapy suitable for sensitive skin?
Yes, red light therapy is non-invasive and generates no UV exposure or thermal damage, making it suitable for sensitive skin. Start with 3 sessions per week and build up from there to 5 sessions per week based on how your skin responds.
Do I need to wear eye protection during red light therapy?
Red light therapy is widely considered safe for the eyes when used correctly with a high-quality, FDA-cleared device. If you are just starting out or have sensitive eyes, simply keep your eyes closed during sessions.
How long do red light therapy results last?
Results are maintained through continued use. To keep results long term:
Transition to a maintenance schedule of 2–3 sessions per week once results are established
Avoid stopping the routine entirely when the skin clears
Pair with SPF daily to protect the collagen your sessions are building
What should I do immediately after a red light therapy session?
The window right after your session is when your skin is most receptive. Make the most of it by:
Following with a Hyaluronic Acid Serum or Peptide Moisturiser to lock in hydration
Applying a Hydrogel Mask for an extra boost of post-session recovery
Avoiding harsh actives like exfoliating acids directly after treatment
Glowing skin is not about a filter or a highlighter. It is a reflection of what is happening beneath the surface. Cellular turnover, hydration levels, collagen density, inflammation, all of it shows up on your skin. The good news is that a natural, lasting glow is achievable at home without an overwhelming routine or expensive in-clinic treatments.
Whether you are dealing with dullness, uneven tone or skin that never quite looks as healthy as it should, the answer is rarely a new product. These five evidence-backed approaches target the root cause and give your skin what it actually needs to kickstart or bring back your glow.
What Does Glowing Skin Actually Mean?
Before chasing a glow, it helps to understand what you are actually looking for. Healthy, glowing skin has three defining characteristics: even tone, smooth texture and good light reflectance. When skin is well-hydrated, the surface is plump and uniform, allowing light to bounce off evenly rather than scatter across rough, dull patches. When cellular turnover is functioning well, dead skin cells clear efficiently, preventing the build-up that makes skin look flat and lacklustre.
Dullness is nearly always a sign of something out of balance. Dehydration, sluggish cell turnover, chronic low-grade inflammation and oxidative stress from UV exposure and pollution all disrupt the skin's natural luminosity. Addressing the cause rather than masking the result is what separates a temporary glow from a lasting one.
1. Prioritise Skin Hydration From the Inside Out
Hydration is the foundation of every skin goal, and glow is no exception. When the skin is dehydrated at a cellular level, it loses its plumpness and translucency. The result is a flat, tired appearance that no topical product can fully compensate for if the underlying hydration deficit is not addressed.
Drinking adequate water is the starting point, but it is not the whole picture. Electrolytes, particularly sodium and potassium, are essential for water to be retained at a cellular level rather than simply passing through. Foods with high water content such as cucumber, watermelon and leafy greens contribute meaningfully to skin hydration. Omega-3 fatty acids found in oily fish, flaxseed and walnuts support the lipid matrix that keeps water locked into skin cells.
Topically, layering a humectant such as hyaluronic acid or glycerin beneath a moisturiser draws water into the skin and holds it there. For best results, apply to damp skin and seal with a moisturiser containing ceramides or squalane to prevent that hydration from escaping.
2. Exfoliate Regularly But Strategically
Dead skin cell build-up is one of the most common and most overlooked causes of dullness. Skin naturally sheds approximately every 28 days, but that process slows with age, stress and environmental damage. When dead cells accumulate on the surface, light scatters unevenly and the skin appears flat, rough and grey-toned.
Regular exfoliation clears that build-up and allows fresh, healthy cells to reach the surface. The key is doing it strategically:
AHAs such as glycolic and lactic acid dissolve the bonds between dead skin cells and are particularly effective for dullness, uneven tone and surface texture.
PHAs such as gluconolactone offer a gentler alternative for sensitive skin with the same brightening effect.
Enzyme exfoliants derived from papaya or pineapple digest dead skin cells without the potential irritation of acids, making them well suited to reactive or compromised skin.
Frequency matters as much as ingredient choice. Two to three times per week is sufficient for most skin types. Over-exfoliation strips the skin barrier, triggering inflammation and paradoxically making skin look worse. Always follow exfoliation with a hydrating, barrier-supporting moisturiser.
3. Use Red Light Therapy to Boost Radiance (Cellular Level)
A lasting glow starts with healthy cell function, and this is precisely where red light therapy delivers results that topical products cannot replicate.
Operating at wavelengths between 630nm and 850nm, red and near-infrared light penetrate beyond the skin's surface and stimulate mitochondrial energy production within skin cells. More cellular energy means faster cell turnover, improved collagen synthesis and a measurable reduction in the oxidative stress that causes dull, tired-looking skin.
Unlike exfoliants or brightening serums that work on the surface, red light therapy improves the quality and behaviour of the cells producing your skin. The result is a glow that comes from genuine skin health rather than temporary surface treatments.
Devices like the Glotech Pro LED face mask make this level of treatment accessible at home, delivering the same clinically proven wavelengths used in professional settings. Three to five sessions per week is the recommended frequency for sustained, visible improvement in skin radiance.
4. Protect Your Skin From Oxidative Stress
One of the most significant and most underestimated causes of dull skin is oxidative stress. UV radiation, pollution, and cigarette smoke all generate free radicals. These are unstable molecules that damage skin cells, degrade collagen and disrupt the even pigmentation that contributes to a healthy glow. Over time, this cumulative damage is one of the primary drivers of an uneven, lacklustre complexion.
Protecting against oxidative stress requires both prevention and active repair:
Vitamin C (L-ascorbic acid at 10 to 20%) is the most evidence-backed topical antioxidant for brightening. A top choice is the Vitamin C Ageless Complex as it neutralises free radicals and stimulates collagen synthesis simultaneously.
Niacinamide (5%) reduces the transfer of pigment to skin cells, calms inflammation and strengthens the barrier against environmental damage.
SPF 30 to 50daily is non-negotiable. UV exposure is the single largest driver of oxidative damage, uneven tone and premature dullness. No brightening routine delivers lasting results without it.
Vitamin E and ferulic acid used alongside vitamin C significantly enhance its stability and antioxidant potency.
Apply antioxidants in the morning before SPF for maximum protective effect throughout the day.
5. Support Collagen Production Through Lifestyle
Collagen is the structural protein responsible for skin's firmness, bounce and that lit-from-within density that characterises genuinely healthy skin. From our mid-twenties, collagen production declines at approximately one percent per year. The visible result is skin that gradually looks thinner, less plump and increasingly dull. What many people overlook is how significantly daily habits accelerate or slow that process.
Three lifestyle factors that have a big impact on your skin glow:
Sleep is where the majority of skin repair and collagen synthesis occurs. 7 to 9 hours of sleep is one of the most impactful and most underutilised tools for glowing skin. During deep sleep the body releases growth hormone, which directly stimulates collagen production and cellular regeneration.
Diet plays an equally important role. Collagen-supporting foods including bone broth, eggs, berries and citrus provide the amino acids and cofactors the body needs to produce collagen internally.
Reducing sugar intake limits glycation, a process in which sugar molecules bind to collagen fibres and degrade their structure, leading to a dull and sagging appearance.
Conclusion
Skin that genuinely glows is not the result of one hero product. It is what happens when hydration, cell turnover, collagen support and cellular health are all working together. The five approaches in this guide are not a checklist to rush through. They are a system, and the results compound the longer you stay consistent.
For those looking to accelerate that process, the Glotech Mask Pro brings clinical-level red light therapy into your home, targeting the cellular foundations of skin glow that no topical product can reach alone. Used consistently alongside the habits and ingredients above, it closes the gap between a good skincare routine and skin that genuinely looks healthy from within.
Getting the most out of your red light device comes down to one thing, your routine. But if you’ve ever searched how often to use red light therapy, you’ve probably seen everything from “daily” to “once a week,” which makes it hard to know what’s actually right for your skin.
That’s why this guide focuses on one of the most common questions people ask: how often should you do red light therapy? To go a step further, we’ll share what dermatologists recommend as an ideal routine, and how that changes depending on your skin goals and device. Because real results come down to consistency, we’ll also break down the best starting schedule, what “too much” looks like, and how to stay on track long enough for benefits to build.
How Often Do Dermatologists Recommend You Do Red Light Therapy?
Most dermatologists recommend using red light therapy three to five times per week, especially when you’re just starting out. This range gives your skin enough consistent exposure to trigger collagen support, recovery, and inflammation control without pushing into overuse. After the first 6–8 weeks, many people shift into a maintenance rhythm of a few sessions per week.
The reason this schedule shows up so consistently in clinical guidance is simple: LED therapy is dose-dependent. Your skin responds better to repeat exposure over time than it does to the occasional long session. If you’re using a high-quality at-home device and your skin tolerates it well, some dermatologists are comfortable with daily use, but most still recommend starting in the 3–5x weekly zone first to build results safely and steadily.
As Dr. Lisa Espinoza, a board-certified dermatologist said: “Red light therapy is dose-dependent. Consistent sessions drive results far more than occasional long treatments.”
Red Light Therapy Treatment Times by Skin Concern
Once you’ve found your baseline, you can adjust your treatment times depending on what you’re targeting. Different skin goals don’t require totally different routines, but they do change the ideal starting frequency and long-term maintenance.
Dermatologist routines (and aligned with your device protocols) look like this:
Face LED treatment (anti-aging, firmness, overall skin health): 10 minutes per session, 5–7 times per week
Spot LED treatment for post-breakout marks, under-eye wrinkles or dark spots: 9 minutes per area, about 5 times per week
Acne treatment for active blemishes: 3 minutes daily on clean, dry skin
Think of the first 3–5 weeks as your “results phase,” then maintenance as keeping skin in a healthier, more stable state. If your concern is stubborn or recurring, staying closer to the higher end early on tends to get you there faster. If your skin is reactive, the lower end works just as well. You just need steady consistency.
Can You Do Red Light Therapy Every Day?
Yes, daily red light therapy can be safe for many people, but only if two things are true: your device is designed for everyday use, and your skin tolerates it well. Higher-quality masks and devices, like those in the LED Esthetics Glotech range, support daily sessions because they deliver stable wavelengths at safe output levels, reducing the risk of irritation.
That said, daily use is optional, not required. If you’re consistent at 3–5 sessions per week, you’re already in the dermatologist-recommended window. Many people prefer that range because it fits real life better and is easier to keep up with for months, which is what results actually depend on.
If you want to try daily sessions, ease in slowly. Start every other day for two weeks and pay attention to how your skin feels. If it stays hydrated and calm, increase. If it starts feeling tight or sensitive, drop back to 3–4 times per week, you won’t lose progress by doing it less, as long as you stay persistent in the long-run.
What Does “Too Much” Red Light Therapy Look Like?
Red light therapy is gentle, so overuse rarely causes serious issues, but it can work against you. When sessions are too frequent or too long, skin may get temporarily dry, warm, or reactive, which often leads people to stop entirely.
Signs you may be overdoing it include:
Mild tightness or dryness that feels new
Sensitivity that lingers after a session
Redness lasting longer than usual
Skin feeling like it needs a break
If you notice these, scale back for a week and focus on hydration. Most people land back in the 3–5x weekly range as their best steady rhythm, and results continue building from there without interruption.
How to Build a Weekly Routine You’ll Actually Stick With
The most effective schedule is the one that feels automatic. Rather than aiming for “perfect,” aim for reliability. Choose fixed treatment days so your routine becomes effortless.
A simple pattern outlined by Dr. Erez Dayan is:
3-day baseline: Monday, Wednesday, Friday
4–5 day results phase: add one or two weekend or alternating days
2–3 day maintenance: keep only your easiest days
Dr. Erez Dayan explains, “Think of this like a workout plan for your skin. The baseline days keep momentum steady, the results phase adds a little extra push when you’re actively trying to change something, and maintenance is what protects the progress you’ve earned.”
Pair it with something you already do such as after cleansing at night, while winding down, or before applying serums in the morning. When treatments fit naturally, they become consistent. And with LED therapy, consistency is what turns “maybe it’s working” into visible, lasting change.
Should You Use Red Light Therapy Before or After Skincare?
Use red light therapy on clean, dry skin, before heavier products. Light penetrates best when there isn’t a thick layer blocking it, so cleanse first and do your session early in the routine. If you want to apply a light-activated or lightweight serum beforehand, this is the ideal moment because it can enhance absorption and support the treatment without interfering with the device’s effectiveness.
After your session, follow with hydration and barrier support. This is a good time for calming serums (like hyaluronic acid, niacinamide, or peptides) and moisturizer. If you use stronger actives such as retinoids or exfoliating acids, apply them after LED or on alternate nights to reduce sensitivity. This simple order helps you get full light penetration and makes your skincare work better afterward.
Final Thoughts: The Routine Backed By Dermatologists
The most common dermatologist recommendation is to use red light therapy consistently, with short sessions around 10 minutes several times per week. Start with your device’s suggested routine, stay steady for at least 6–8 weeks, and then adjust into a maintenance rhythm that fits your life and skin goals.
The key isn’t doing more, it’s doing it regularly enough for your skin to build momentum. If you keep your sessions short, repeatable, and realistic, the benefits stack exactly the way they’re meant to, and staying consistent becomes easy instead of a hassle.
From breakouts to loss of firmness, your skin’s needs are always changing. Some days it’s oily and congested, other times it’s dry, reactive, and difficult to calm. Understanding what your skin is asking for and responding with targeted care is key to achieving lasting clarity and resilience.
LED face masks can be the perfect skincare tool for navigating those shifts. But not all light therapy devices are created equal. Choosing the right one for your skin type and goals can make the difference between short-term improvements and real transformation. That’s where LED Esthetics shines, offering professional-grade LED masks that support your skin health.
LED face masks use light energy to target skin concerns like breakouts, redness, and signs of aging. Each wavelength penetrates the skin at different depths to trigger natural healing responses.
The most common LED mask wavelengths are red and blue. Red light penetrates deeper to boost collagen, reduce inflammation, and improve skin texture, while blue light targets surface-level acne-causing bacteria to clear and prevent breakouts. Some masks also include near-infrared light for deeper tissue repair and long-term rejuvenation, along with yellow light to calm irritation and enhance radiance.
According to Dr. Espinoza , medical director at La Chelé Medical Aesthetics , LED therapy can be a powerful and empowering addition to any skincare routine, particularly for those managing hormonal shifts, post-procedure recovery, or early signs of aging. She emphasizes that consistency is key, and that at-home masks like the GloTech™ range allow patients to stay on track with their skin health goals between visits.
What to Look for in an LED Face Mask
Choosing the right LED face mask starts with knowing what your skin needs and finding a device that targets those concerns with the right light wavelengths. With so many options out there, it’s important to be selective. Many masks aren’t backed by clinical research and may not be proven to work safely or effectively.
How the mask fits your face matters just as much as the wavelength it uses. For the best results, choose a mask made from soft, medical-grade silicone that molds closely to your skin. This helps the light reach every area evenly. Rigid masks or those with LEDs spaced too far apart can lead to patchy coverage and less noticeable results.
FDA clearance is also key. Medical professionals like Dr. Espinoza emphasizes that the device you choose should be proven safe and effective, not just a marketing claim. Without proper testing and approval, there’s no guarantee it will deliver real results.
Best for Acne-Prone and Inflamed Skin: GloTech™ Lite
If breakouts and inflammation are your main concern, the GloTech™ Lite ($329) is your go-to. This ultra-lightweight, wireless LED mask combines red and blue light to reduce acne, calm redness, and support a clearer, more balanced complexion.
Use it 3–5 times per week for just 10 minutes to:
Kill acne-causing bacteria
Reduce redness and post-inflammatory flare-ups
Prevent new breakouts before they start
Its travel-ready design, USB rechargeability, and medical-grade silicone build make it ideal for anyone who wants simplicity without sacrificing results.
Belinda C.
“I am so very happy with my GloTech mask! Not only have I seen a difference, my family has noticed without me even mentioning that I've been using the mask!”
Glotech™ Lite
Glotech Lite features the same high-intensity blue light therapy in a streamlined, durable plastic design.
It’s a cost-effective and beginner-friendly option for anyone exploring light-based acne solutions without compromising on power
Best for Skin Clarity and Recovery: GloTech™ Mask Pro
Ranked #1 by Top 10 LED Masks, the GloTech™ Mask Pro ($399) is recognized as one of the best LED light therapy face masks, combining medical-grade red, blue, and near-infrared light to deliver deeper skin repair and clearer results.
This mask goes deeper, helping to:
Calm inflammation and speed post-procedure healing
Stimulate collagen production and reduce fine lines
Improve skin clarity, texture, and tone over time
Dr. Espinoza calls it “a game-changer” for at-home skin maintenance between clinical visits:
“The GloTech™ Mask Pro delivers professional-level results in a home setting. It’s thoughtfully designed, incredibly comfortable to wear, and allows patients to stay consistent with their skin health routines between visits.”
If your skin is sensitive, aging, or slow to bounce back after stress or treatments, the GloTech™ Mask Pro gives you the clinical-grade recovery and restoration your skin is looking for.
Josie T.
“Not only have I noticed a brighter, more even skin tone—it also helps with wound healing.”
Glotech™ Pro
Glotech Pro is a lightweight, medical-grade silicone LED mask offering both blue and red light wavelengths.
Blue light fights active acne while red light stimulates collagen production , aiding in skin recovery and minimizing post-acne marks.
It’s ideal for users seeking an advanced, dermatologist-level treatment from home.
How to Use Your LED Mask for Best Results
LED therapy is only as effective as it is consistent. For best results, use your mask 3–5 times per week on freshly cleansed and dry skin. Avoid applying moisturizers or creams beforehand to ensure the LED light penetrates deeply and effectively.
For a perfect pairing, apply a light-activated serum like the LED Esthetics Vitamin C Ageless Complex before your session to amplify brightness and collagen support. After treatment, finish with LED Esthetics’ Hydrogel Masks to lock in hydration and soothe the skin—enhancing both comfort and glow.
Most users begin to see visible improvements within 4–6 weeks of consistent use, including clearer tone, calmer skin, and a healthier overall complexion.
Category
GloTech™ Mask Pro
GloTech™ Lite
Light Modes
Red, Blue, Infrared
Red, Blue
Session Duration
15–20 minutes, 3–5x per week
10–15 minutes, up to daily
Best For
Hormonal acne, inflammation, aging skin
Mild acne, redness, oil control
Usage Tips
Combine with light-activated serums for enhanced results
How I Treated My Cold Sore with the Glotech™ Lip Wand: A 3-Day Journey
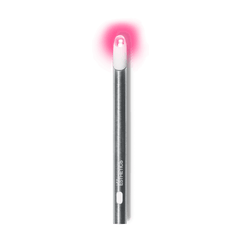
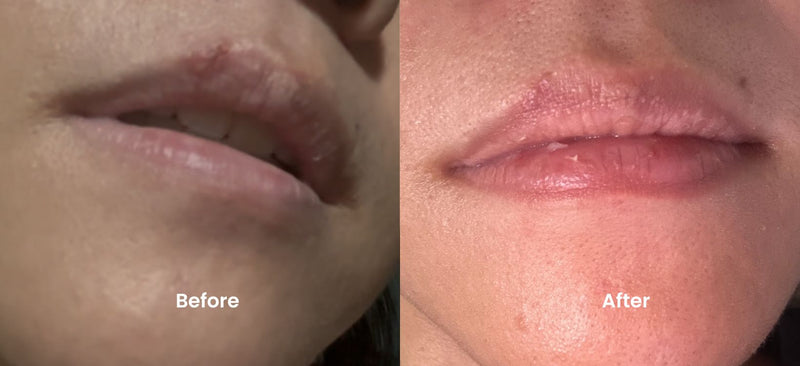
Cold sores always seem to pop up at the worst possible time. For me, it was a few days the day before a big event, and I could already feel that familiar tingling sensation starting on my lip. Knowing how frustrating and painful cold sores can be, I didn’t want to wait around and let it get worse. That’s when I decided to try the Glotech™ Lip Wand .
Here’s my 3-day journey treating my cold sore with the Glotech™ Lip Wand.
Day 1: The Onset
.
It started with that dreaded tingle—a warning sign that a cold sore was on its way. I’ve dealt with cold sores in the past, and I knew that if I didn’t take action immediately, it would become more painful and noticeable in the next 24 hours. I grabbed the Glotech™ Lip Wand , which I had read could help with cold sores using LED light therapy.
.
I was skeptical at first, but I had nothing to lose. I used the wand on the affected area every four hours throughout the day. The cool sensation of the device immediately soothed the irritation, and after the first few sessions, the discomfort began to subside. The area still looked red and a bit swollen, but the tingling sensation had already lessened.
Day 2: A Noticeable Change in Size
.
By the next morning, the cold sore had grown as they normally would, but this time it didn’t flare up or become filled with pus. The swelling was still present, but it wasn’t as severe, and the sore looked much less inflamed than usual. I continued using the Glotech™ Lip Wand every four hours. By the afternoon, there was a noticeable decrease in size. The light therapy reduced the redness and swelling, making the cold sore feel less noticeable. While I would typically expect the blister to worsen, this time it started shrinking much sooner than expected.
Day 3: Almost Gone
...
By Day 3, I could barely see the cold sore. What normally takes over a week to heal was now almost gone in just three days. There was still a slight mark, but it was much less visible, and the area didn’t feel tender or painful anymore.
..
I couldn’t believe how quickly the Glotech™ Lip Wand had worked. Typically, a cold sore would leave me feeling self-conscious and uncomfortable for several days, but this time, the healing process was faster and much less of a hassle. I felt confident enough to attend my event without worrying about a glaring cold sore on my lip.
Final Thoughts
..
Cold sores are never fun, but the Glotech™ Lip Wand turned what could have been a week-long ordeal into a manageable three-day journey. Using it every four hours helped reduce the size and severity of the sore, making the whole experience far less stressful than usual.
.
If you’re someone who deals with cold sores, this device could be a game-changer. Not only did it soothe the discomfort, but it also sped up the healing process in a way I hadn’t experienced before. I’m definitely keeping this tool handy for future flare-ups!
Are you tired of dull, tired-looking skin? Glotech devices might be the game-changer you've been searching for. With the power of LED light therapy, you can unlock radiant, youthful skin without invasive treatments or expensive products. Here are five essential Glotech LED therapy hacks that will help you achieve that glowing complexion you've always wanted.
1. Choose the Right Glotech Device
. The first step to achieving radiant skin with LED esthetics is selecting the right device. Not all LED devices are created equal. Look for a high-quality device like the Glotech Pro, which is made of silicone and offers better light penetration compared to its plastic counterparts. The Glotech Pro is designed to deliver professional-grade results in the comfort of your home. Investing in a premium device ensures you get the most out of your LED therapy sessions.
2. Tailor the Treatment to Your Skin Concerns
.
LED therapy is versatile and can address various skin concerns, from acne to aging. Understanding which LED light color targets your specific issues is crucial. Here’s how to use Glotech devices effectively:
.
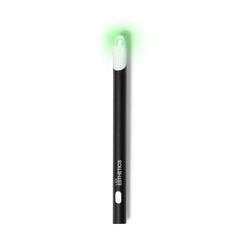
Glotech Acne Wand: Utilizes blue light to kill acne-causing bacteria, reduce inflammation, and prevent breakouts. Perfect for maintaining clear, blemish-free skin.
Glotech Lip Wand: Uses red light to promote collagen production, reduce fine lines, and enhance the overall appearance of your lips.
By tailoring your treatment to your skin's needs, you can achieve optimal results. Many advanced Glotech devices offer multi-color options, allowing you to switch between treatments as needed.
3. Consistency is Key
.
While LED therapy can deliver noticeable results, consistency is essential for maintaining and enhancing those benefits. Incorporate Glotech treatments into your regular skincare routine. Aim for sessions at least three times a week, and be patient – it can take several weeks to see significant improvements. Consistent use will ensure that your skin continues to look radiant and youthful.
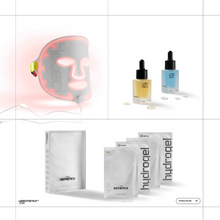
4. Enhance Your Routine with Complementary Products
. Maximize the effectiveness of your Glotech therapy by pairing it with complementary skincare products. After your LED session, apply a hydrating serum or moisturizer to lock in moisture and nutrients. Here are some top choices to consider:
Hydrogel Masks: Provide intense hydration and soothing benefits, perfect for use after an LED session to enhance the skin’s absorption of nutrients.
CC Ageless Complex: A potent anti-aging serum that targets fine lines and wrinkles, working synergistically with LED treatments to rejuvenate the skin.
5. Don't Forget Specialized Treatments
.
Don't forget targeted treatments. The Glotech range offers specialized devices for specific areas. The Glotech Acne Wand effectively spot-treats acne, providing clear and smooth results. The Glotech Collar is designed to focus on the often-neglected neck and decollete area, promoting skin tightening and reducing wrinkles with powerful red light therapy. For maintaining a youthful appearance, the Glotech Lip Wand treats cold sores and makes lips softer and more radiant.
Conclusion
.
Say goodbye to the frustration of acne and hello to clear, radiant skin with Glotech's LED treatments. Whether at home or on the move, Glotech has a solution to help you combat acne and reclaim your confidence. It's time to zap those zits with science!
3 Skincare Ingredients Proven to Supercharge LED Treatments and 2 That Will Sabotage Them
LED treatments are a cornerstone of modern dermatological care, offering a non-invasive solution to combat aging, reduce inflammation, and enhance skin rejuvenation. However, the effectiveness of LED therapy can be greatly influenced by the skincare ingredients used in conjunction with the treatments. In this blog, we'll explore three key ingredients that can significantly boost the benefits of LED therapy, and we'll also highlight two types of ingredients to avoid, as they may impair your treatment's effectiveness.
Superchargers for LED Treatments
.
Bakuchiol: The Plant-based Powerhouse
. Bakuchiol, often touted as a natural alternative to retinol, stands out for its ability to deliver similar benefits without the irritation typically associated with retinoids. This potent antioxidant enhances cell renewal, boosts collagen production, and visibly reduces signs of aging. When used with LED treatments, bakuchiol can significantly intensify these effects. The CC Ageless Complex harnesses the power of bakuchiol, making it an excellent addition to your LED therapy regimen to achieve a more youthful and vibrant complexion. Enhance your skincare routine with the CC Ageless Complex by visiting here .
Copper Peptides: The Skin Repair Enhancer
. Copper peptides are renowned for their healing properties, including their ability to promote collagen and elastin production, which can diminish as we age. When paired with LED treatments, these peptides can accelerate the skin’s repair processes, reduce redness, and increase firmness and elasticity. The Biocell Copper Peptides serum is enriched with copper peptides and is specifically formulated to enhance the results of LED therapy, providing not only rejuvenation but also intensive moisture and firmness. Get into the rejuvenating properties of the Biocell Copper Peptides here .
Hyaluronic Acid: The Ultimate Moisturizer
. Hyaluronic Acid (HA) is a powerhouse humectant capable of holding 1000 times its weight in water, making it an essential ingredient for maximum hydration. Integrating HA with LED therapy can dramatically improve hydration levels, minimize the appearance of fine lines, and support the skin’s healing and regenerative processes. Our Hydrogels are designed to complement LED light wavelengths, ensuring deeper penetration and optimal hydration. Explore the benefits of Hydrogels for your LED treatment here.
Ingredients to Avoid
.
To ensure the best outcomes from your LED therapy, certain ingredients should be avoided as they can hinder the effectiveness of the treatments:
.
Essential Oils
. Essential oils, while popular for their scent and purported therapeutic properties, can cause skin sensitivity and irritation, particularly when used in conjunction with LED treatments. Their use can counteract the benefits of LED therapy by promoting inflammation rather than reducing it.
Chemical Sunscreens and SPF Products
. Sun protection is important for skin health, but certain sunscreens, especially those containing chemicals like avobenzone and octinoxate, may react negatively under LED lights. Additionally, SPF products can block the LED light from penetrating the skin effectively, reducing the efficacy of the treatment. It's advisable to use mineral-based sunscreens without SPF or to ensure that any SPF is fully removed before undergoing LED therapy to maximize your results.
By integrating bakuchiol, copper peptides, and hyaluronic acid into your skincare routine while avoiding essential oils and SPF-containing products, you can dramatically enhance the effectiveness of your LED treatments. LED Esthetics is dedicated to providing top-tier products that not only complement your skincare regimen but also support and amplify the benefits of LED therapy. Discover our curated selection and elevate your skincare experience to new heights.